How to Generate a File Inventory of an Entire Folder Tree in Windows
How to produce a structured recursive file listing of a folder tree in Windows — with full paths, sizes, dates, and file hashes — ready to paste into a spreadsheet.
If you need a complete listing of every file inside a folder tree — every subfolder, every file, with names, paths, sizes, and dates — Windows doesn't make it easy. File Explorer shows you one folder at a time. Copy as path only handles your current selection. The built-in commands that can walk a tree recursively (dir /s, PowerShell's Get-ChildItem -Recurse) produce output that needs reformatting before it's useful.
Why you might need this
The usual reasons people need a full recursive file inventory:
- Handover and handoff. Taking over a shared drive, project archive, or departing colleague's files, and needing to document what's there before anything gets moved or reorganized.
- Audit and compliance. Producing a defensible record of a document collection's contents at a specific point in time, often with hashes for evidentiary integrity.
- Backup verification. Listing what's on the source and what's on the destination after a large copy or migration, then comparing the two to confirm nothing was lost or corrupted.
- Media and asset libraries. Cataloging entire photo, video, or audio collections for a master spreadsheet, backup manifest, or rights-management database.
- Legal discovery and document review. Producing filename and metadata listings for document sets that will be reviewed or submitted as evidence.
What these use cases have in common is that the output needs to be structured — not just filenames, but filenames combined with full paths, sizes, dates, and often file hashes, in a format that pastes cleanly into a spreadsheet.
The built-in options
dir /s
dir /s /b "C:\path\to\folder" > inventory.txt
This walks the tree and produces one full path per line. It works, but that's all you get — no sizes, no dates, no structure. Adding attributes means dropping /b and accepting the formatted directory-listing output, which has headers, footers, and alignment that aren't spreadsheet-friendly and need significant cleanup to become useful data.
PowerShell Get-ChildItem -Recurse
Get-ChildItem -Recurse -File | Select-Object FullName, Length, LastWriteTime |
  Export-Csv inventory.csv -NoTypeInformation
For someone comfortable with PowerShell, this is actually a reasonable answer. It produces a proper CSV with the columns you pick. The problems are practical: you need to remember the syntax, you need to edit it for each different folder, there's no way to kick it off from a right-click in File Explorer, and handing this workflow to a colleague who doesn't use PowerShell isn't realistic. For a one-off technical task it works; for an ongoing process that multiple people on a team need to perform, it's friction every time.
Third-party tree tools
Utilities like tree /f produce visual ASCII tree output, which is useful for documentation but not for spreadsheet workflows. They're a different shape of answer to a different shape of question.
The practical solution: CopyFilenames with a Pro license
CopyFilenames lets you copy file information in whatever format you need straight from File Explorer's right-click menu. A Pro license adds folder recursion, so commands can walk an entire tree instead of operating only on what you've selected.
Pro ships with a set of pre-built recursive commands in the Command Gallery, under the Folder Listings category:
- Copy Simple Folder Listing — a hierarchical text view of every folder and file with sizes
- Copy JSON Folder Listing — a structured tree suitable for feeding into other tools
- Copy XML Folder Listing — a structured tree with file names, sizes, and modified dates as XML attributes
- Copy Markdown Folder Listing — a human-readable Markdown document of every folder and file
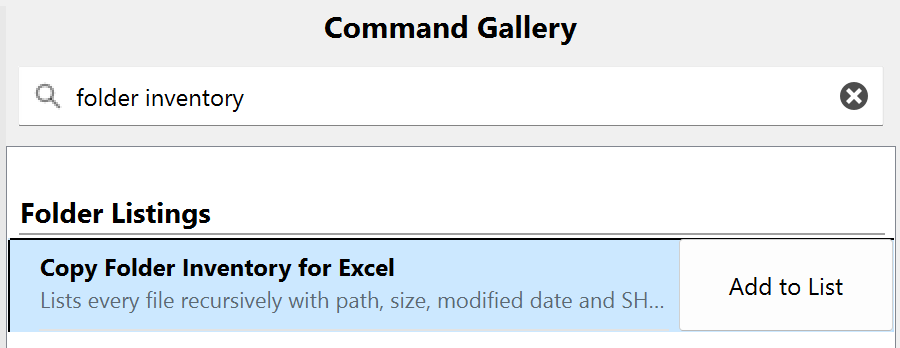
- Copy Folder Inventory for Excel — a flat tab-separated table with path, size, modified date, and SHA-256 hash, ready to paste into a spreadsheet
For audit work, Copy Folder Inventory for Excel is the one you want. It produces output like this — one row per file, tab-separated, with a header row Excel can use as column titles:
Path	Size	Modified	SHA-256
D:\Archive\2025-Handover\readme.txt	412	03/11/2025 09:14	594e519ae499312b29433b7dd8a97ff068defcba9755b6d5d00e84c524d67b06
D:\Archive\2025-Handover\Contracts\acme-msa-v3.pdf	284516	22/09/2025 16:48	5e691ae66b0f9360be3fcc2e71f7e53a72c42992764373ac98c675b6742d1517
D:\Archive\2025-Handover\Contracts\acme-nda.pdf	112940	11/08/2025 11:02	78ba9dbdb2a95361dc70d90227f7c37df9ec3cbc8478175e3577609fc08f548d
D:\Archive\2025-Handover\Reports\2025-Q3-summary.docx	58234	15/10/2025 14:30	5af5adc392fdbe17e5ea37db96221c86cd2e2f11d7eb0fe344f0ba206771b07e
Picking the command from the gallery
For a one-off inventory:
- Right-click the top-level folder in File Explorer and choose Copy Filenames → More Commands. The Configure dialog opens.
- Click Browse Gallery... below the command lists. The gallery panel opens alongside.
- Scroll to the Folder Listings category — or type inventory into the filter box at the top — and select Copy Folder Inventory for Excel. The clipboard preview at the bottom of the gallery shows what it will produce for the folder you right-clicked.
- Click OK to copy the inventory to the clipboard.
- Paste into Excel.
That's it for an occasional audit. The output is tab-separated, one row per file, with Path, Size, Modified, and SHA-256 columns. Ready for a spreadsheet with no post-processing.
Adding it to the right-click menu
If you'll be running inventories regularly, add the command to your context menu so future inventories are a single right-click:
- In the Configure dialog, make sure the Context Menu Commands tab (the left tab) is selected — commands are added to whichever tab is active.
- Open the gallery via Browse Gallery... and select Copy Folder Inventory for Excel.
- Click Add to List. The command is added to your context menu.
- Click OK to save and close.
The command now appears in the Copy Filenames sub-menu. The daily workflow becomes:
- Right-click the top-level folder in File Explorer.
- Choose Copy Folder Inventory for Excel from the Copy Filenames sub-menu.
- Paste the result into Excel.
You can edit the command later — or use it as a starting point for variations with different columns or hash algorithms — from the same Configure dialog.
Why the hash output matters for audits and backups
For audit and backup-verification use cases, the hash column is often the whole point. A filename-plus-size listing tells you whether a file exists; a filename-plus-hash listing tells you whether its contents match. CopyFilenames can include MD5, SHA-1, SHA-256, SHA-512, CRC32, or xxHash64 hashes directly in the inventory output, which means a single command gives you everything needed to compare a source and destination tree for byte-level integrity — not just completeness.
Producing the same output with PowerShell is possible but involves combining Get-FileHash with Get-ChildItem and reshaping the result, which is enough friction that most people skip the hash verification step entirely. Once a right-click menu command is configured to include a hash column, the friction is gone — and "I probably should verify this backup" turns into "I already did".
When a Pro license is worth it
CopyFilenames covers a wide range of everyday filename-copying tasks without a license, and is genuinely free for personal use — no trial timer, no nag screens. Folder recursion is the point at which the tool stops being a convenience and starts being professional infrastructure, and that's what a Pro license unlocks.
Pro also unlocks CopyFilenamesCL, a command-line companion that runs any saved command from the terminal, PowerShell, or scheduled scripts. For the use cases in this guide, that's often as valuable as the recursion itself — an inventory command you can invoke from a scheduled task is the difference between "remember to run the audit" and "the audit ran last night, here's the diff".
For the use cases this guide covers — audits, compliance records, backup verification, handover documentation, legal discovery — the license cost is trivial relative to the value of having a reliable, repeatable, spreadsheet-ready inventory process that anyone on a team can run. A single audit task done manually, or a single backup-verification failure that goes unnoticed, costs more than the license several times over.
Frequently asked questions
How deep does the recursion go?
All the way down — the entire subtree from wherever you start.
Can I exclude certain folders or file types?
Yes. The commands are configurable to filter by extension or pattern.
Does it handle very large trees?
Yes, though obviously the time taken and the size of the output scale with the number of files. For inventories of tens or hundreds of thousands of files, the output is best pasted into a proper spreadsheet rather than a text editor.
Does it work over network drives and UNC paths?
Yes, anywhere File Explorer can browse.
Can I schedule a recursive inventory to run automatically?
Yes, with CopyFilenamesCL — the command-line companion included with a Pro license. Any command you've configured in CopyFilenames can be run from a script or Windows scheduled task, including commands you've kept off the right-click menu to reduce clutter — CL accesses them by name regardless. The output is identical to what you'd get from clicking.
What does a Pro license unlock for this task?
Three things, all of them relevant: folder recursion (without it, commands only operate on the files you have selected, not the tree below them), CopyFilenamesCL (so you can run inventories from a script or scheduled task), and removal of the "for commercial use only" notice. CopyFilenames is a single application — entering a Pro license activates these features in your existing install, no separate download or reinstall.